The new version 3.1.4 of vna/J is released.
As a new feature it supports now overscan in calibration mode 1. Please check chapter "User defined" on page 98 of the user guide.
The application JAR can be downloaded from here as usual.
With the following images I'll try to explain the dependencies between the calibration file and the calibration data used for a specific scan.
Basics
First assume we have an analyser with a frequency range from 1MHz to 200MHz. This means, that every calibration file for this analyser contains calibration data for the complete range from 1MHz to 200MHz.
This is illustrated with this image 
Each space between the vertical lines specifies a frequency range where the same calibration data is present.
Here you can see, that the creator used calibration mode 1 and specified 5 calibration ranges. Maybe the user has chosen 1MHz-10MHz with 10steps, 10MHz-70MHz with 8 steps and so on.
Remember, that the number of overscan has no influence on the following informations. When using overscan, simply the mathematical mean is calculated of i.e. 3 identical scans.
Scan from 50MHz-100MHz
Now assume, the user wants to execute a scan in the frequency range from 50MHz-100MHz with 100 samples (these many vertical lines in the upper bar == width of diagram area in vna/J main window):
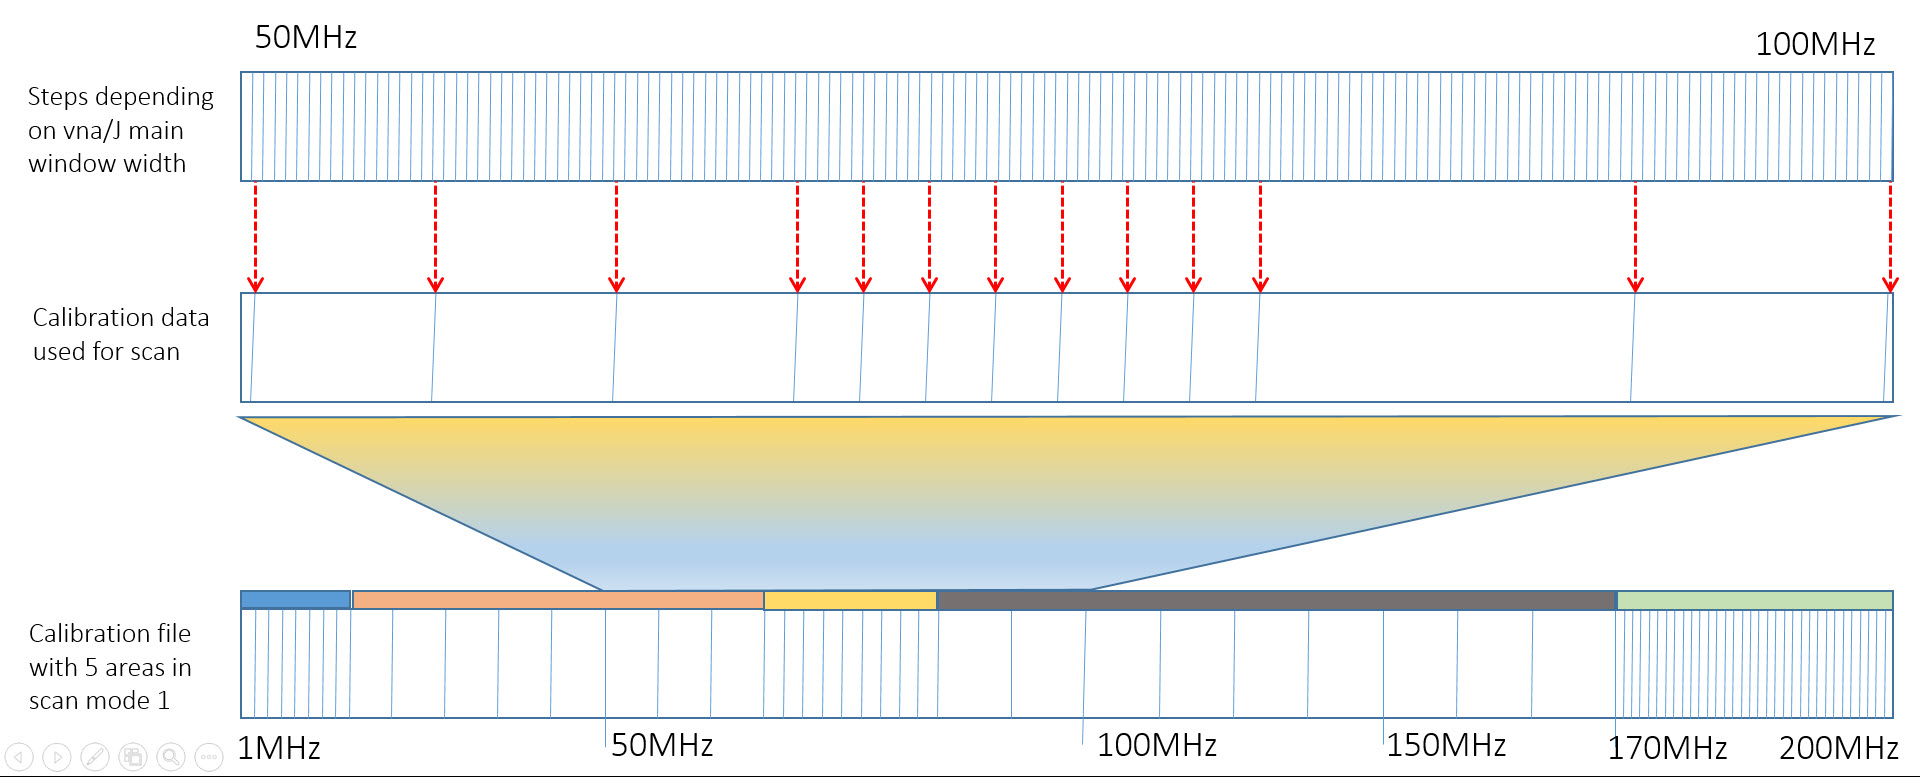
So from the complete calibration data only the relevant data in the range from 50MHz-100MHz is used.
As there are not enough calibration points available, for more than one sample the same calibration data is used. Here for the sample data from 50MHz-60MHz only one calibration point is used.
With so less calibration point, the created diagramm will be a little bit rough ;-)
Scan from 170MHz-200MHz
Another example. Here the user wants to execute a scan in the frequency range from 170MHz to 200MHz - again with these 100 samples.

As there are more calibration point available in the range, the diagramm will be a little bit smoother, compared to the previous sample.
I hope I can clarify the logic behind calibration and scan width a little bit.